Pages

Tuesday, December 23, 2008

Dyeing before Christmas

I have been collecting onion shells for a while now and decided last night that I had enough to try a little dyeing. I had seen the great results on Slingerbult´s page and have wanted to try it ever since. So I decides on dyeing small bundles of embroidery yarn which had been treated with alum. All three went in and and they took in the colour great. So I tried using ironsulfur for one of them (? - the danish word is jernvitriol). The colurs of the ones that had only been in onion shells went quite orange and the one treated with iron in the end went dark brown. I must say that I´m really happy about the result although the yarn is a bit spottet. I think this is due to the alum and that I didn´t move the yarn as much as I should have.

So filled with succes I wanted to try something else. My dear friend Christopher bought safran to me last time he was in Spain. It is much cheaper there than here in Denmark so he was so kind as to bring some home for me. It is said to be one of the most expensive/luxuary colours in the middle ages, next to indigo and kermes. I tried with a small bundle of yarn again and use about 4-5 grams of safran. It really doesn´t take much before it dyes and the colour is very strong so be careful not to make a mess with it.

The end result is SO beautiful! The colour is very yellow and very rich. So it is easy to understand that people wanted that colour. It was a great succes and I going to have Christopher to buy me some more safran in Spain next time he goes.

I put the yellow next to some of the other natual dyed colours that I have in my embroideri kit at the moment. On the to next to the safran it is madder. In the bottom it is indigo and an yellow that has been dipped in indigo.

Wednesday, December 10, 2008

Pleated apron

I made a pleated apron for my brothers girlfriend this summer. I used some of the many great internet sites to find information about the projekt: Larsdatter - here you can find a lot of great pictures of different kinds of aprons from the Middle Ages. At the site you can also find a pdf-file on pleated aprons.
Here are blogs that shows how to make this type of apron:
Sasphyria
Matrilda la Zouche´s Wardrobe - this one is really great and was the one that I got a lot of "how-to-do" information out off.

This is the end product - Louise (yes she has the same name as me :0)) is very happy with it and have worn it to two markets during the summer. She gets a lot of questions and "oh that is really nice" so that makes me want to make one during winter for myself. I think I might make the combes a bit smaller so that they don´t open quite as much.


Here are some pictures that show how I made the smock/pleat effect:

This picture shows how I made marks on the fabric (the blue dots) and have sewn it with a bight colour thread so that I can see it when I have sewn the combs together (the the next pictures)

Here the threads have been pulled together and the fabric is now ready to have the combes/the spuares sewn.

And this is the end result af the pleating.

Monday, December 8, 2008

Pump-drill

I have wanted to make a drill for re-enactment purposes for at very long time now.
So last week, when i got an oppotunity to try some woodturning I desided that my first ever woorturning-project, was to be a so-called "pump-drill".


Although I don't have any sources of these drills being used in medieval times, I can only think that they must have had them...
The mecanism that rotates the drill is very simple and has been used for at least a couple of hundred years, by all sorts of craftsmen (namely goldsmiths).

I haven't made the drill-bits, for the pump-drill yet. But photos of these will follow as soon as I figure out how to make them... Along with a demonstration!

The drill is made from oak-wood and norwegian soapstone.


The soapstone fly-wheel makes the drill rotate steadily and wind up the cords that spins the shaft of the drill.


The cord is mounted on both ends of the "cross-bar" (?) by a knot tied to a small nail.


At the top of the shaft the cord passes through a hole. This makes sure that the cord is equally long on both ends of the "cross-bar".

Saturday, November 29, 2008

Pictures from Nationalmuseet

I added some new pictures to the archive. This time they are from Nationalmuseet in Copenhagen.
I photographed various household objects... and some of the fancy stuff :-)

--> Arhcive link

Enjoy!


Monday, November 17, 2008

More Embroidery

I promissed that I´d show more pictures of the silk embroidery when it came along. Now I´m allmost finished and I am now woundering about that colour to put in side the little pouch.
I have found some red silk and so far that is the best option.


I have also started a new project. I were looking at the internet one day and came across a great idea on a blog some were. So I can´t say that the idea is mine. You can see the original idea at EWKA She have finished here pillow and it will be very intresting to see the end result.

The idea is to make a bed pillow with squares in white, red and greens in a checker pattern. There were shown a couple of 15th century pictures of bedding scenes and behind the back of the person in bed were the pillows.

So I have now started the project. I had it with me on a small winter market here in start November and found it to be so much easier to talk to people since the pattern is so easy. There is no complicated animals/geometric patterns and that ment that I actually hade some work done eventhough there were poeple to talk to.

My plan is that the pillow is going to be about 40 x 60 cm. I can´t quite decide if the pillow is going to be open in the ends with lacing or if it is going to be closed. I´ll have to look at some more pictures before I decide.

Monday, November 10, 2008

New! Haandkraft picture-archive!

Louise and I decided to start collecting pictures from Danish (and foreign) museums. The pictures will all be of different findings, mainly from the medieval period. Nice artefacts from other periods will be included as well :-)

Picture Archive link ---> http://s389.photobucket.com/albums/oo335/Haandkraft

(You can navigate the gallery by clicking the menu on the left of the screen. Click the "Museer"-button, thereafter click the "Dueholm kloster"-button... or clik here)

The first pictures are from the museum "Morslands historiske museum" in Nykøbing Mors (my home town).
It's been a while since i last visited the museum, but i found that they had quite al lot of nice findings on display.
So I took some pictures :-)

There were both medieval, viking-, and iron-age stuff (and lots, and lots of other things).


Thursday, October 16, 2008

The Helgeansholmen purse

Some time ago there was a discussion at Historiska världars forum about a purse found at Helgeansholmen in Stockholm (Sweden). It is by far the best preserved purse I have ever seen, and the purse was found in a Scandinavian country. So naturally I was acking to make a "replica" of it right away.
And thanks to some of the readers from the forum, some very nice drawings and photographs were made public, so that people could have a go at copying the purse.
Especially the user "Admin" (I believe his name is Henrik) provided some nice pictures.

So I have been thinking about this project for at long time now, and finaly I got around to doing something about it :-)
And the result is by far the most authentic purse I have ever made. So naturally I am very pleased with the result.
I can't say that the purse is 100% authentic, because not all of the parts have survived (the binding, straps, lining and pockets are all gone). So this can only be my interpretation of the original purse... but I really do feel that I have come close :-)

The pictures provoded by "Admin" can be found here:
http://www.medeltidenitiden.se/material/20080909_helgeand_purse.zip

The purse can be found at Medeltidsmuseet in Stockholm. Althoug it isn't on display right now. It will be from january 2010.


Here comes the pictures:


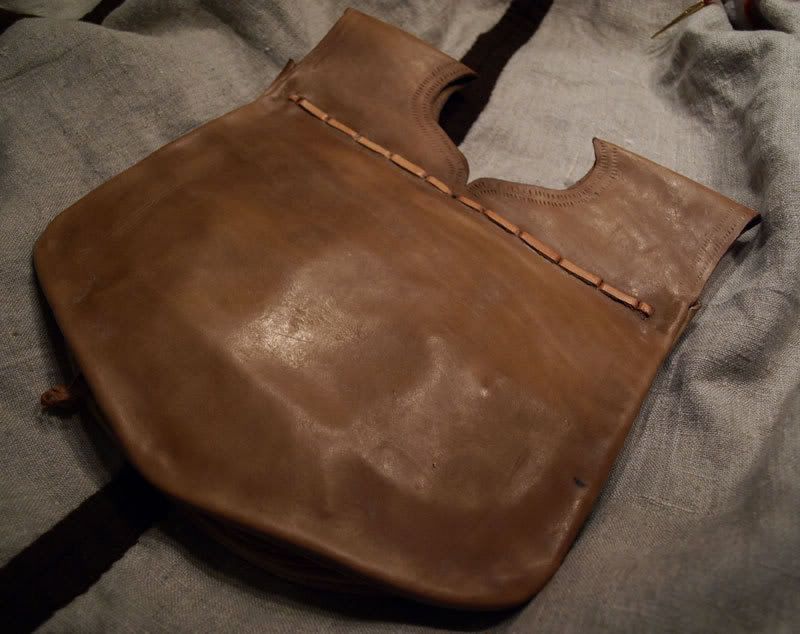
The purse measures 25 x 25 cm, and is pretty large compared to some of the purses in "Purses in Pieces".


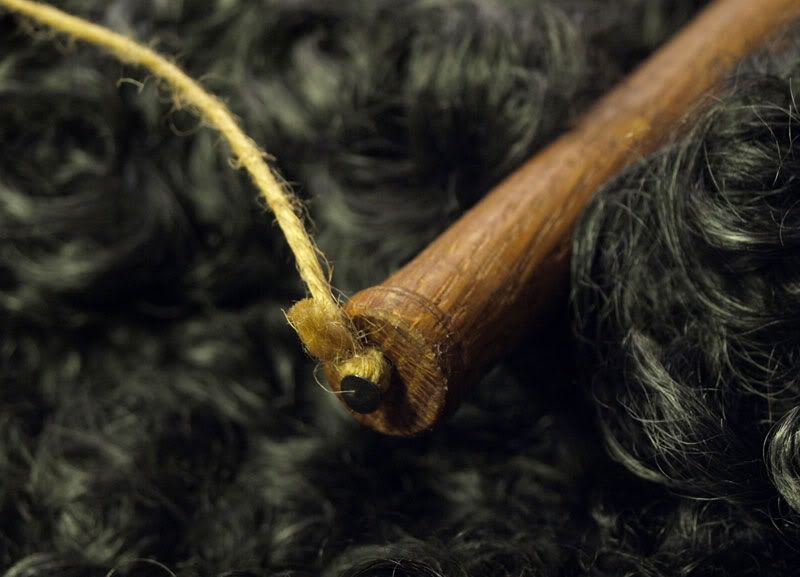
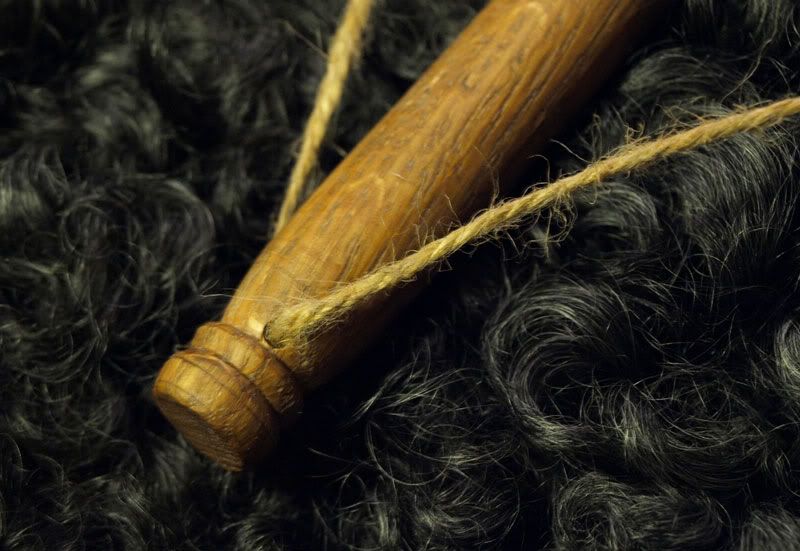
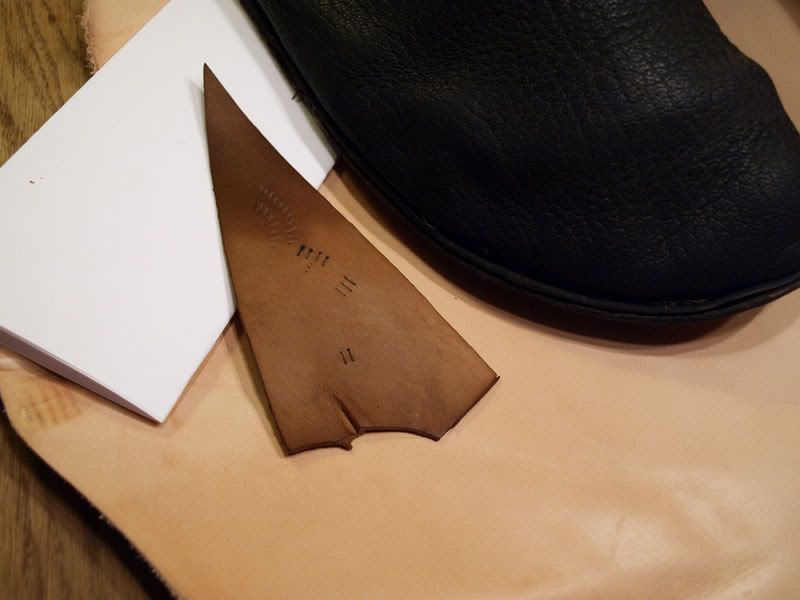
I made the incisions for this decoration, with a very small knife, that i made by hammering a nail flat, and sherpening it.


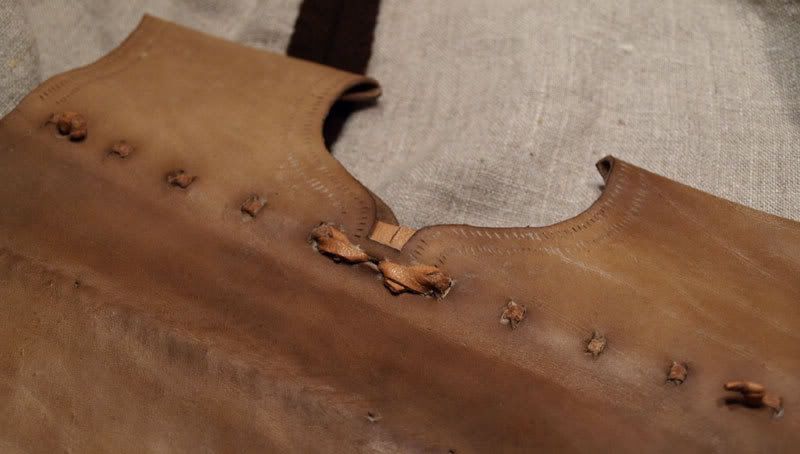
The thing about this purse I spent the most time, trying to figure out were the shape of the pockets on the front of the inner compartment of the purse.


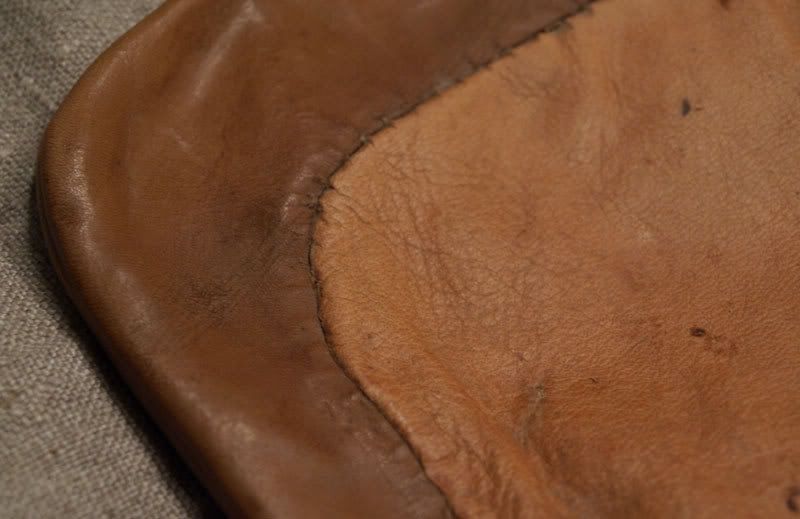
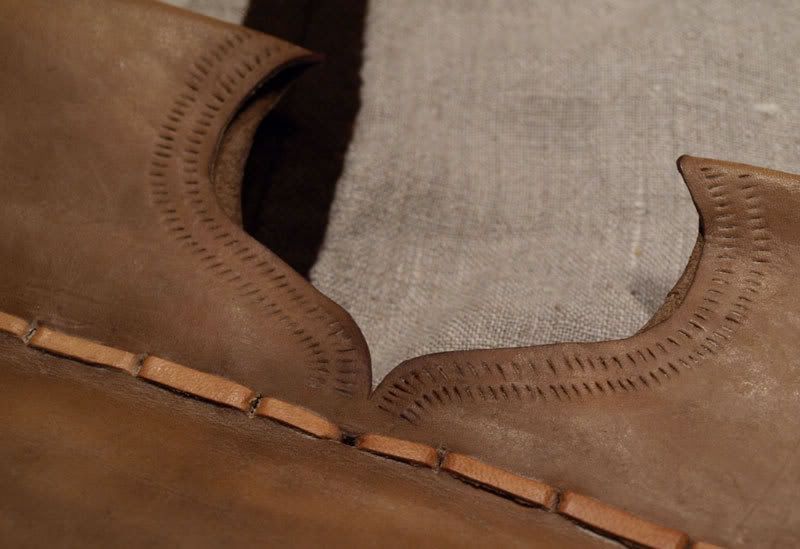
The lining of the flap has been sewn with stiches that doesn't penetrate the outside of the leather. I'm not entirely sure if the lining on the original purse was made from leather. It might as well have been made from fabric.
I chose leather because it i more durable than fabric.


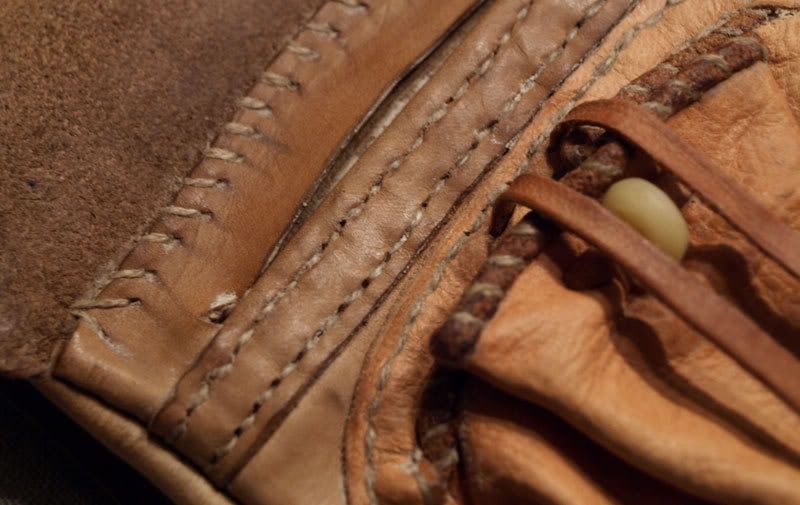
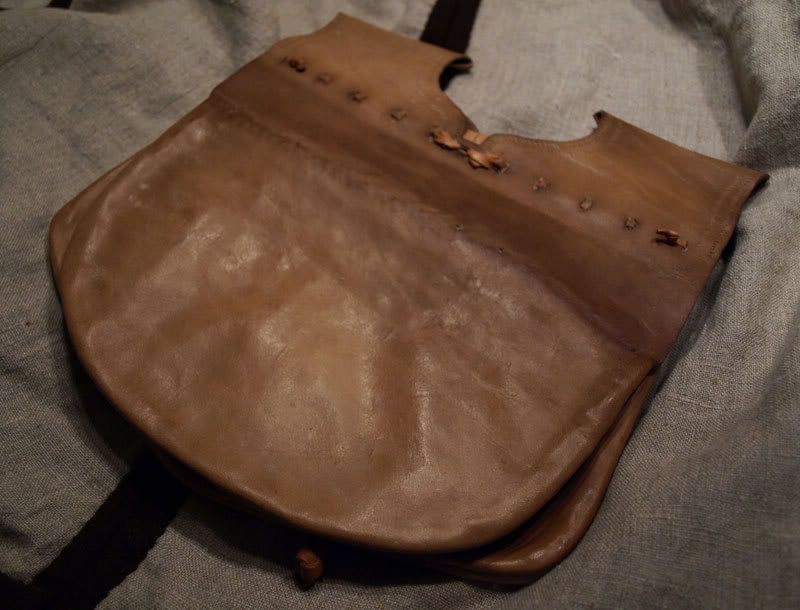
the inner compartment was also joined to the back of the purse with stiches that only pass through the flest side of the leather, This protects the stiches from being worn down when the purse is in use.
I suspect that the flax thread won't last very long, when it is continually being "scrubbed" by wollen clothes.

The leather was dyed with walnutshells and leaves, and greased with a mixture of tallow, beeswax and pine tar.

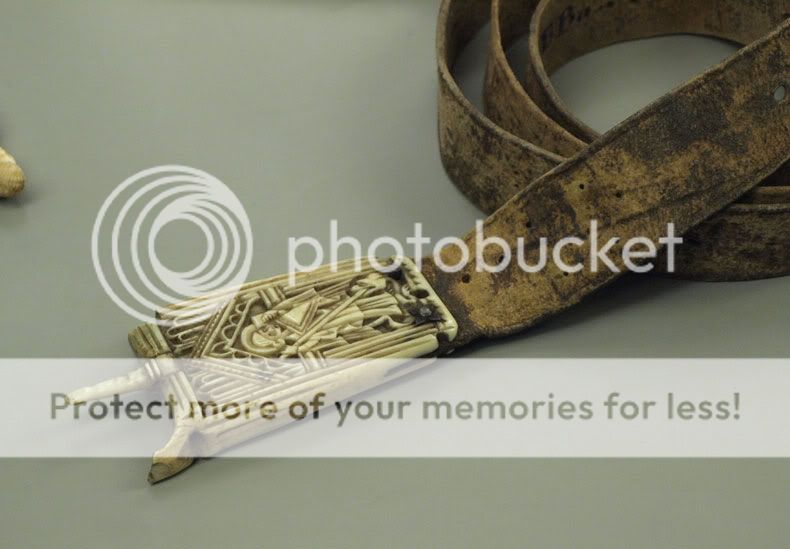
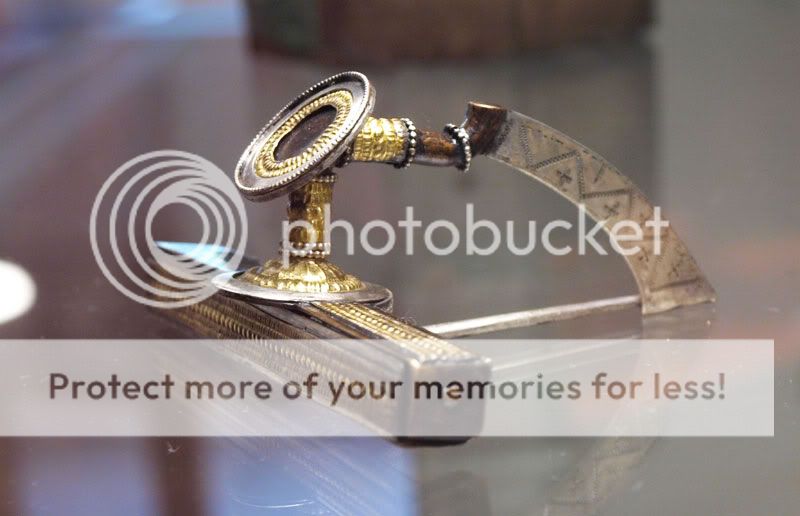
Here are some pictures of the original:


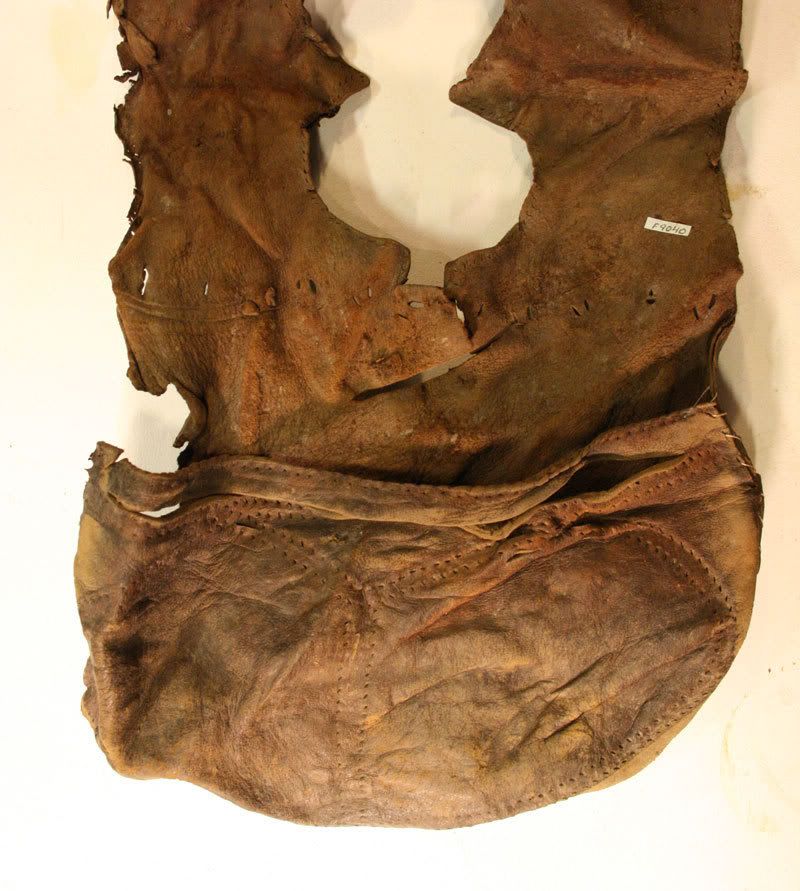
I really recomend that you download the pictures that i linked to earlier on in this article. They probive an enormous amount of info on this purse.
The zip-file also contains drawings of the purse and all the different parts (all four of them!).

Aditional pictures can be seen at my photobucket: http://s163.photobucket.com/albums/t306/MikkelF84/Takser/helgeansholmen/

I will also post the pattern I made for the purse as soon as I get the time to scan it.

Monday, October 13, 2008

Natural dying - Madder

I have been on a medieval market this weekend and have dyed wool yarn with my friend Janni. I had prepared some wool from home with alum and also brught some that had not been treated. This was to see how different the wool took in the colour.

This is the result from the "hard" work.


I dyed two baches that have been treated which I´m going to use for "nålebinding"/"needlebinding". And the one in the middle that hadn´t been treated with alum is a very thin embroidery yarn. There is a clear difference in the two types of yarn but I´m very excited about both colours. And I were very happy to see that the embroidery yarn took in so much colour. So for the future I´m going to dye some more for embroidery purposes.

We got a lot of response on your dying and people really were interested in hearing about natural dying. Though some kids thought that we were making red pasta with blod :0).

Sunday, September 28, 2008

Leather dyeing

For a long time I have been somewhat unsatisfied with the colours available from the traditional alcoholic based leather dyes.
Partly because the colour-range is limited (althoug the coluors can be mixed) and partly because the dyes are far from being historicly acurate (In must admit that I don't even have a clue as to wich pigments are used in the alcoholic dyes).

Therefore I have done some experiments with "natural" dyes. Two different dyes to be specific.
One based on iron and one based on tannins.

The reason for this experiment is also that I am currently working on a "reconstruction" of a purse found at Helgeandsholmen in Sweden.
I want this purse to be as authentic as I can make it... within the reach of my capabilities.


The picture above shows the two kinds of dye that I have used. The leather in the background is plain, undyed vegetable tanned leather (from a cow). The black shoe in the upper right corner is dyed with iron and the brown piece og leather in the middle is dyed with walnut leaves and shells (the green shells of the fruit, not the brown hard shells of the nut).
The paper in the background is there to give you some idear of the real depth of the colours.


Iron oxide (black):

this i made very simply by dissolving iron in an acidic liquid. The iron is dissolved and absorbed into the leather. When the leather is dried the iron oxidises and turns the leather black (a blueish black).
I used steel wool wich i immersed in water with a dash of vinegar. The tannins contained in the leather should be enough, but i added a bit of vinegar to speed up the process a bit.
The leather should be left in the water for a day or two and stirred about at least a couple of times daily.
The leather will slowly turn black... and when it is greased the colour will become somewhat deeper and darker.


Walnut leaves/shells (Dark brown):

by boiling leaves and shells of walnuts the tannins in the plant is drawn out and can be used as a dye.
The process is very simple.
Pick some leaves or shells fra a walnut tree. Put them in a pot and add as much water as is needed to barely cover the leaves. Boil the whole thing for a couple of hours until the water turns brown (like very strong cofee). Filter the dye to remove the leaves and shells.
When the mixture is cooled, it is ready for use.
The leather that is to be dyed, is then immersed in the dye and left there for 8-10 hours. Maybe longer if you desire a darker tone.
When you are happy with the colour the leather should be rinsed in running water for a short while and left to dry.
The result is a grayish brown, wich gaines a lot from being greased. This will deepen the colour (the tip of the brown piece of leather in the middle of the picture has been greased).

Tuesday, September 16, 2008

Medieval silk embroidery

Now it´s my turn to contribute with a new post to this new blog. I have made some embroidery in the last year - see my old blog
I found some really great silk on a market and have now started a new piece. The picture doesn´t really do the silk justice but you can get a sense the glow a bit in the white and the yellow. I´t makes a really great diffence to make the embroidery in silk and not in DMC - so that is the plan in the future (or to use a really thin or strong wool)

Thursday, September 11, 2008

Birka wallet

To start up this new blog I will post my latest project.
It is a 9.th. century wallet from Birka. Not an axact repliccation, but a wallet inspired by the findings from Birka.


The wallet is made from ca. 1 mm thick goatskin and the dark parts have been dyed.
I didn't have alot of sources on the this type of wallet exept for a small notice in "Purses in Pieces" and some pictures i found on the net.
So the decorations are mostly speculative.


Some say that the braids were made from gilded leather og metal bands wowen into the leather. but i wasn't abled to werify one or the other. So i just used leather strips.

The leather strips were draw
n through the laether using an awl. I tried just pushing them througt, just using my fingers, but that was way to complicated.

Here are some pictures of how i fastened the braids to the wallet. The straps are made from one single strap, wich have been cut into three strips held togeather in one end.


These are all the parts of the wallet. The two big pieces are the front and back and the three small ones are the pockets for the inside of the wallet.


And here are the pictures i found og one of the original findings. The first picture is a drawing of an original and the second i a reconstruction. I don't know from where these pictures were taken, but i'm guessing it is from some book...


All in all i think the results came out pretty nice.